Preparing Your Landscape Lighting for Fall: Maintenance and Upgrades
Posted on October 19, 2024
As the leaves change color and the days grow shorter, it's important to pay attention to your landscape lighting. With fall approaching, this is the perfect time to ensure your outdoor lighting is in top shape. Properly maintained lights not only keep your yard looking beautiful but also ensure safety and security around your home.
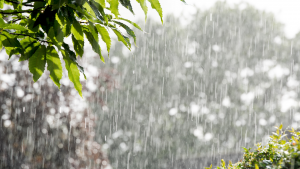
Fall weather can be unpredictable, with frequent rains and cooler temperatures. These changes can affect your outdoor lighting system. By focusing on a few key maintenance tasks, you can keep your lights working efficiently and extend their lifespan. This includes checking for damaged cables, replacing faulty bulbs, and upgrading to more energy-efficient options.
In this article, we'll walk you through the essential steps to prepare your landscape lighting for fall. From cleaning fixtures to adjusting light timers, we've got you covered. Follow our simple guide to keep your outdoor space well-lit and welcoming all season long.
Understanding Landscape Lighting Needs in Fall
As fall approaches, the needs of your landscape lighting change. The days grow shorter and the nights longer, requiring more efficient and reliable lighting to maintain your outdoor spaces' beauty and safety. Fall also brings cooler temperatures and sometimes unpredictable weather. This can affect how well your lighting system performs.
During this season, it's essential to focus on both functionality and aesthetics. You’ll need lights that can withstand colder and wetter conditions. Consider if you need to add more lights to cover areas that will be covered in more shadow during the shorter days. Enhancing certain spots like walkways and entrances ensures safety, while highlighting trees and garden beds maintains a pleasant appearance.
Evaluating your lighting needs in the fall helps you prepare for coming months, making your yard not just beautiful but also safe for family and guests.
Common Issues with Landscape Lighting as Seasons Change
When seasons change, several common issues can arise with your landscape lighting. Being aware of these problems can help you address them before they escalate.
- Corrosion and Rust: Fall brings more moisture, and this can cause metal parts of your lighting fixtures to rust or corrode. This not only affects the look but also the functionality.
- Moisture Infiltration: Rain and dew can seep into the fixtures, leading to short circuits and bulb failures.
- Plant Overgrowth: As your plants grow throughout the summer, they can block light paths and reduce the effectiveness of your lighting.
- Shifted or Tilted Fixtures: Ground shifting from heavy rain or soil settling can move your fixtures, pointing them in the wrong direction.
- Animal Interference: Animals looking for food or making nests might damage your lighting cables or fixtures.
Addressing these issues early on ensures your lighting system remains effective and durable through the fall. Regular check-ups and maintenance can prevent these common problems from becoming major ones.
Why Fall Maintenance is Crucial for Landscape Lighting
Maintaining your landscape lighting in fall is crucial for several reasons. First, the shorter days and longer nights mean your lights are used more, so they need to be in top condition. Second, fall weather can be harsh, with more rain and lower temperatures, affecting the durability and performance of your lights.
Fall maintenance helps identify minor issues before they become major problems. Fixing a small leak or replacing a worn-out bulb is simpler and cheaper than dealing with more significant damage later. Regular maintenance also extends the lifespan of your lighting system, saving you both time and money in the long run.
Moreover, maintenance ensures the safety of your outdoor areas. Properly functioning lights prevent accidents, such as tripping over dark walkways or steps. Keeping your lights well-maintained also enhances the overall appearance of your yard, making it a welcoming space for family and guests.
Essential Tools for Maintenance and Repair
Having the right tools on hand is essential for efficiently maintaining and repairing your landscape lighting. Here’s a list of tools you'll need:
- Screwdrivers: These are essential for opening light fixtures. Different types, like flat-head and Phillips, are usually required.
- Pliers: Useful for gripping and bending wires and other small parts.
- Wire Cutters and Strippers: These are necessary for trimming and preparing your wires for connecting new lights or repairing old ones.
- Voltage Tester: Ensures that your lights are working correctly and helps you troubleshoot electrical issues.
- Replacement Bulbs and Fuses: Always have these on hand to quickly swap out any that have failed.
- Waterproof Tapes and Sealants: These help repair any cracks or seal any gaps to keep moisture out.
- Gloves and Safety Goggles: Necessary for protecting yourself while working.
- Ladder and Step Stool: Essential for reaching higher fixtures safely.
- Cleaning Supplies: Such as soft cloths, mild detergent, and a bucket of water to keep your fixtures clean and clear.
Having these tools ready makes the maintenance and repair process more straightforward, ensuring you can handle most common issues quickly and effectively.
Step-by-Step Guide to Cleaning Light Fixtures
Keeping your light fixtures clean is essential for optimal performance and longevity. Here's a simple step-by-step guide to help you:
- Turn Off the Power: Safety first. Ensure the power supply to the light fixtures is turned off before you start cleaning.
- Remove the Fixtures: Gently dismantle the light fixtures, including any covers, shields, or bulbs.
- Clean the Fixtures: Use a soft cloth and a mild detergent mixed with water to clean the fixture parts. Avoid abrasive cleaners that can damage the materials.
- Rinse and Dry: Rinse the cleaned parts with clean water to remove any soap residue. Dry them thoroughly with a clean, soft cloth.
- Clean the Bulbs: Wipe the bulbs with a dry, soft cloth. Make sure they are also free from any dirt or grime.
- Reassemble the Fixtures: Once all parts are clean and dry, carefully reassemble the fixtures.
- Restore Power: Turn the power back on and test your cleaned light fixtures to ensure they are working properly.
Regular cleaning not only keeps your lights bright but also helps extend their lifespan by preventing dirt buildup that can lead to overheating.
How to Check for Damaged or Worn-Out Cables
Regularly inspecting your lighting cables helps to catch potential issues early. Follow these steps to check for damaged or worn-out cables:
- Turn Off the Power: Ensure the power supply to your lighting system is turned off to avoid any accidental electric shocks.
- Visual Inspection: Carefully examine the length of the cables for any visible signs of wear, such as cuts, frays, or exposed wires.
- Feel for Damage: Run your fingers along the cables to feel for any irregularities that might not be immediately visible.
- Check Connection Points: Pay close attention to the areas where cables connect to fixtures and power sources. These points are often vulnerable to damage.
- Look for Burn Marks: Burn marks or melted sections can indicate overheating or electrical faults.
- Test with a Voltage Tester: Use a voltage tester to ensure the cables are conducting electricity properly and that there are no breaks in the line.
If you find any damage, it's crucial to replace or repair the affected cables immediately to maintain the safety and efficiency of your lighting system.
Replacing Faulty Bulbs: A Simple How-To
Replacing faulty bulbs is an easy task that can greatly improve your landscape lighting. Here’s how to do it:
- Turn Off the Power: Make sure the power supply to the lights is off to avoid any risk of electric shock.
- Remove the Old Bulb: Carefully unscrew the old bulb from the fixture. If the bulb is broken, use gloves and possibly pliers to remove it safely.
- Check the Fixture: Before installing the new bulb, inspect the socket for any signs of damage or corrosion. Clean it if necessary.
- Install the New Bulb: Screw in the new bulb securely but not too tightly. Ensure it’s suitable for outdoor use and matches the fixture’s wattage requirements.
- Turn the Power Back On: Once the new bulb is in place, restore the power to the lighting system.
- Test the Light: Turn on the light to ensure the new bulb is working correctly and providing adequate illumination.
Regularly replacing faulty bulbs keeps your landscape well-lit and functional.
Upgrading to Energy-Efficient Lighting Options
Upgrading to energy-efficient lighting options is a smart choice, especially as the seasons change. Here are some steps and tips to help you make the upgrade:
- Evaluate Your Current System: Take note of the type and condition of your existing lighting fixtures and bulbs.
- Choose LED Bulbs: LED bulbs are energy-efficient and have a longer lifespan compared to incandescent and halogen bulbs. They also produce less heat, reducing the risk of overheating.
- Check Compatibility: Ensure that the new LED bulbs are compatible with your existing fixtures. Some older fixtures might need adapters.
- Consider Solar-Powered Options: For areas with sufficient sunlight, solar-powered lights can be an excellent energy-efficient choice.
- Look for Energy Star Ratings: Bulbs and fixtures with an Energy Star rating have passed stringent efficiency tests and are a reliable option for energy savings.
- Install Dimmers and Timers: Adding dimmers and timers to your system helps manage energy use and extend the lifespan of your bulbs.
Making these upgrades will lower your energy bills and reduce your environmental impact while keeping your landscape beautifully illuminated.
Adjusting Light Timers for Shorter Days
As the days get shorter in the fall, it’s important to adjust your landscape lighting timers. Proper timing ensures your outdoor spaces are well-lit when you need them most, enhancing both safety and aesthetics.
- Reprogram Timers: Most digital timers are simple to reset. Change the settings to align with the earlier sunset times. If your system uses manual timers, locate them and move the dial to match the current daylight hours.
- Test the Adjustments: Once you’ve reset the timers, monitor them over a few evenings to ensure they activate and deactivate at the right times. Make minor tweaks if necessary.
- Consider Photocells: If reprogramming timers feels overwhelming, you might want to install photocells. These devices automatically adjust based on the amount of daylight, making them a set-and-forget solution for seasonal changes.
Adjusting your light timers correctly helps maintain consistent illumination and reduces energy waste.
Tips for Enhancing Lighting for Fall Aesthetics
Fall brings unique opportunities to enhance the beauty of your landscape with lighting. Here are some tips to make the most of this season:
- Focus on Foliage: Highlight fall foliage by placing lights under trees or shrubs. This accentuates the vibrant colors of leaves and adds depth to your yard.
- Use Warm Lights: Swap out cooler lights for warm-toned ones. Warm lights create a cozy, inviting atmosphere suitable for fall evenings.
- Spotlight Features: Draw attention to focal points like garden statues, water features, or pathways. Use spotlights or floodlights to illuminate these features.
- Layering Lights: Combine different types of lights like spotlights, path lights, and string lights to create layers of illumination. This adds interest and dimension to your landscape.
Enhancing your landscape lighting for fall can transform your yard into a beautiful, inviting space even as the days grow shorter.
Weatherproofing Your Landscape Lighting
As fall weather can be unpredictable, it’s essential to weatherproof your landscape lighting. Proper weatherproofing extends the life of your lighting fixtures and ensures they function correctly in various conditions.
- Seal Connections: Ensure all electrical connections are properly sealed against moisture. Use waterproof connectors and wrap them in electrical tape for added protection.
- Protect Fixtures: Install covers or shields over your fixtures to keep rain and debris out. Use fixtures rated for outdoor use, designed to withstand harsh weather.
- Check for Damage: Inspect your cables and fixtures for any signs of wear or damage. Replace frayed wires or cracked fixtures promptly to avoid water infiltration.
- Elevate Ground Fixtures: If possible, lift ground-level lights slightly off the ground to prevent water accumulation. Use stakes or mounts to keep fixtures steady and elevated.
By weatherproofing your landscape lighting, you can ensure your outdoor spaces remain well-lit and safe throughout the fall season.
Benefits of Professional Lighting Maintenance and Repair
While DIY maintenance can handle minor issues, professional services bring several benefits that ensure your landscape lighting is in top condition.
- Expert Knowledge: Professionals have the expertise to identify and solve complex problems that might not be apparent to the average homeowner.
- Advanced Equipment: They use specialized tools and equipment to provide thorough inspections and repairs, ensuring all components work efficiently.
- Long-term Savings: Professional repairs can prevent small issues from becoming major problems, saving you money in the long run. They also recommend energy-efficient upgrades that reduce electricity costs.
- Safety Assurance: Professionals follow safety protocols to mitigate risks associated with electrical work, ensuring a safer home environment.
Opting for professional maintenance and repair services ensures your landscape lighting remains functional, efficient, and beautiful year-round.
Conclusion
Maintaining your landscape lighting through the fall season ensures your outdoor spaces remain safe and visually appealing. From adjusting light timers to weatherproofing fixtures and enhancing fall aesthetics, each step plays a crucial role. Professional lighting maintenance and repair services can offer expert solutions and long-term benefits that go beyond DIY efforts.
Andy's specializes in lighting maintenance and repair, providing the expertise you need to keep your landscape beautifully lit. Contact us today to schedule an appointment, and let us light up your nights this fall. Your home and garden will shine brighter with our help!